|
31-May-05
10700 mi
|
Short-person mod fitted to car by previous
owner |
Longer seat bolts fitted to jack seat
up by 30 mm |
 |
Remove bolt; shorten by 300mm, refit,
ensuring that washers are refitted to protect GRP floor.
Check bolts a few days later to ensure
they are still tight!
|
|
31-May-05
10700 mi
|
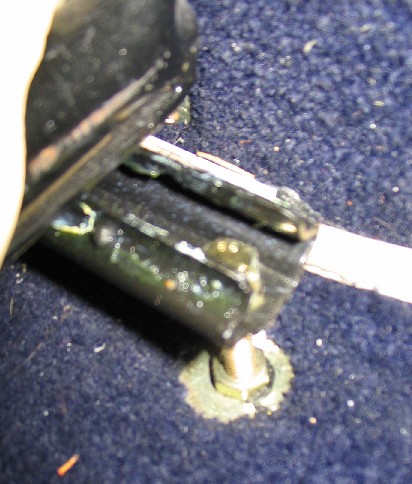
Reversing light not working |
Tail light internal fittings behind
velcro'd pocket are different to those described in handbook or Heath
book
Unscrew light housing - by
gripping the outside of threaded housing and twisting in the usual
direction. Found bulb obviously blown
|
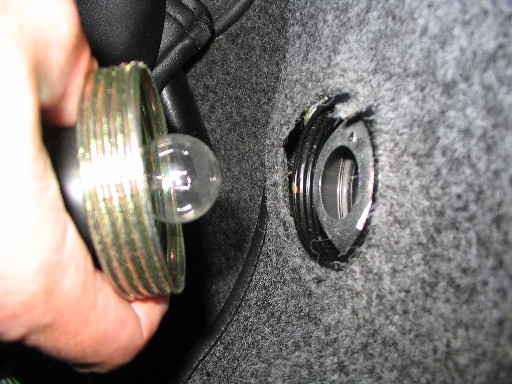 |
Replace bulb - 21W single filament
|
|
01-Jun-05
11000 mi
|
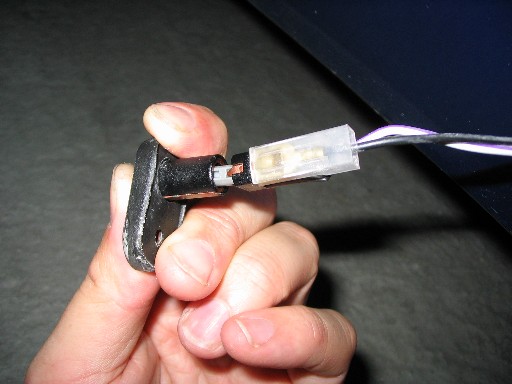
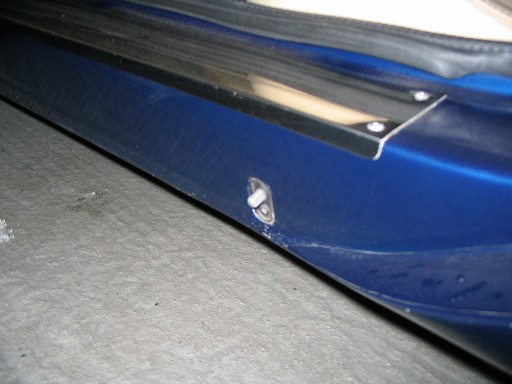
Passenger Door not unlocking from outside |
Inside knob still working => electrical
rather than mechanical. Tried various combinations of locking and
unlocking, including cycling c/locking overide button on top of internal
door opening knob.
Central locking seemed a little 'confused' - or was it me?
Checked operation of
lock solenoid behind velcro'd carpet behind passenger B-pillar and then checked plunger on door sill as originally advised on
Pistonheads!
Mine has no mating rubber pad on door, but
instead a screwed-in
metal cup on door.
|
|
Removed & inspected plunger switch;
metal contact ring appeared to be a little mucky; WD40'd and refitted -
no recurrence of problem since
|
|
11-Jun-05
11300 mi
|
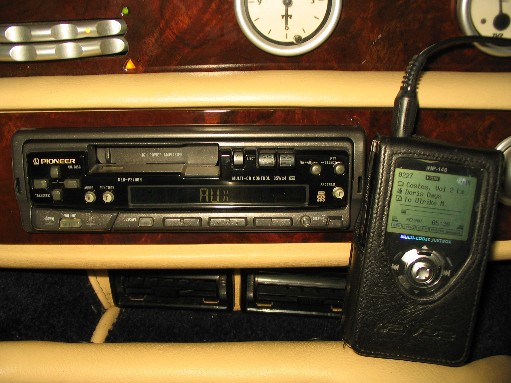
Want to connect I-River MP3 player to Aux
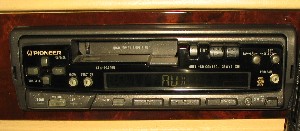
port on my factory-fit Pioneer KEH-P3700R stereo |
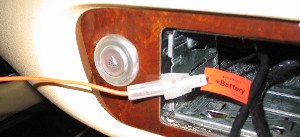
Aux port uses the same multi-connector as
the CD autochanger; therefore an additional 'adaptor box' is required.
Before removing the radio, activate the
'aux' mode on the setup menu
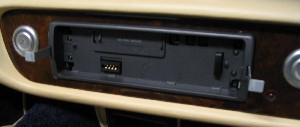
Remove the Radio, using the standard
flat removal tools (mine came with the car!)
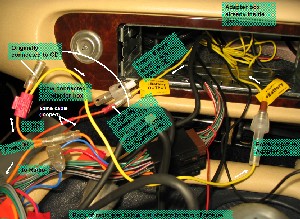
Confirm the route through from back of radio to front of dash.
This is accessed at steering column base;
I used a tent peg to confirm this and then pull through the cable
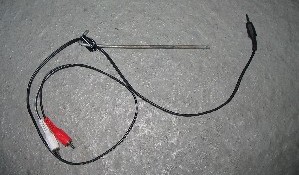
Next, check the wiring between the
back of the radio and the car. It is important to use a multimeter
to identify what each lead REALLY does!
Note my radio does not operate without
the ignition on - different to as described by the Heath book
Click the pic for a bigger version:
Once you've got the wiring right and
you've proved it works, then it's time to position it all and put the
radio back
Position the box behind the ribbon
connectors and flush against the back wall.
When I'd finished & was
test-driving it, I found that the box could be heard happily vibrating
when the engine was at idle, so I revisited the box mounting and put a
little high temp foam under and behind it - that sorted the vibration,
but made the radio fit a little more snug! |


|
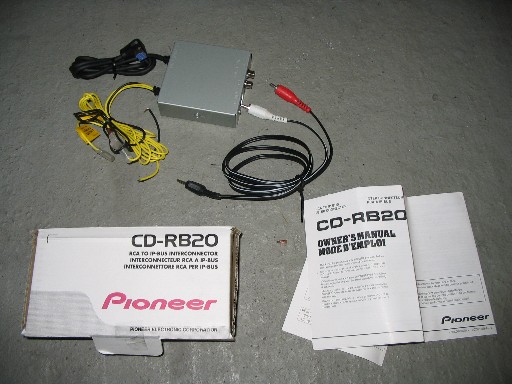
This is a Pioneer CD-RB20 - my local ICE
store Car Electronics had it in stock (£65) and also supplied advice
Hold the 'FUNCTION' button for 2
secs with the unit off.
This will access the setup menu - page through the options until you get
to AUX: OFF - change this to AUX: ON
it's amazing what you find in the
bottom of your toolbox....
The pulled through lead can then be pushed into the gap between the
central console and fed into the space in front of the window switches.
This fused lead initially appeared to
be the live from the battery into the radio. WRONG! this is
the output power from the radio to the CD changer!
Two yellow leads from the adaptor box -
one (with no connector) is the power input to the box; the other (with
the connector) is power output from the box to the CD changer.
I connected the earth from the adaptor
box to the body of the existing radio unit - works for me!
Watch out for the ribbon connectors!
And this proves why you need to test drive a radio modification.
Perhaps 200 miles was a little too much though!!
The finished article
|

